✨ Introduction
Have you ever stared at your living room wall and thought, “Something’s missing”? Blank walls can make a room feel plain and unfinished. The good news is—you don’t need to spend hundreds of dollars on fancy art or prints. With a little creativity, you can make your very own wall art that feels personal, fun, and totally “you.”
DIY wall art projects are one of the easiest (and cheapest!) ways to decorate your space. You don’t need to be an artist, and you don’t need fancy supplies. A few simple items like paint, fabric, string, or even tape can turn into beautiful art pieces that make your living room cozy and stylish.
This blog will share 10 fun and simple DIY wall art projects that anyone can make—even if you’ve never picked up a paintbrush before. Whether you’re decorating a new space, looking for budget-friendly ideas, or just want a fun weekend project, these ideas are for you.
Remember, creating art isn’t about being perfect. It’s about having fun, trying new things, and making your home feel more like your home. So grab your supplies, roll up your sleeves, and let’s turn those blank walls into something amazing!
1. Abstract Canvas Painting
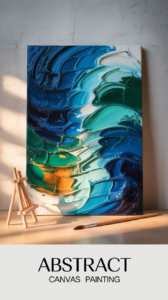
Abstract painting is one of the easiest wall art projects for beginners because there’s no “wrong” way to do it. You don’t have to draw people, flowers, or anything realistic—you just get to play with color, shapes, and texture. That means even if you’ve never painted before, you can still end up with a piece that looks modern and stylish.
The best part is you can pick colors that match your living room. Want something bold and eye-catching? Try bright reds, blues, or yellows. Prefer a calm, cozy vibe? Go for soft neutrals, pastels, or earth tones. No matter what you choose, your painting will instantly make the wall feel more alive.
Imagine hanging up a piece of art that you made—something no one else has. It’s not just decoration, it’s a little piece of your creativity shining in your home.
What You Need:
-
Paintbrushes or sponges
-
A cup of water and paper towels
How To Do It:
-
Pick your colors. Think about your living room—do you want bright and bold, or soft and calming?
-
Squeeze some paint onto a paper plate.
-
Use a brush or sponge to spread the paint on your canvas in big shapes, lines, or swirls.
-
Keep layering colors until it looks fun and finished to you.
-
Let it dry completely, then hang it up!
✨ Encouragement: Don’t worry if it looks “messy”—that’s the magic of abstract art! Your painting will be one-of-a-kind, just like you.
2. Framed Fabric Art
Do you have some pretty fabric scraps lying around from an old pillowcase, shirt, or craft project? Instead of letting them sit in a drawer, you can turn them into beautiful wall art! Framed fabric art is a simple and inexpensive way to add color, pattern, and personality to your living room.
The fun part is you can pick any fabric that matches your style. Love bold and colorful? Try floral or geometric prints. Want something calm and cozy? Choose soft neutrals or linen textures. You can even mix and match a few smaller frames for a mini gallery wall.
This project is especially great if you’re decorating on a budget. Fabric is often cheaper than buying prints, and frames can be found at dollar stores or thrift shops. In just minutes, you’ll have unique art pieces that make your walls look polished and stylish.
What You Need:
-
Fabric scraps (cotton, linen, or anything you like)
-
Picture frames (any size, even small ones look great in groups)
-
Tape or fabric glue (optional)
How To Do It:
-
Pick your fabric. Lay it flat and choose the section of the design you like best.
-
Cut the fabric slightly larger than the size of your frame.
-
Place the fabric inside the frame, making sure it’s smooth and centered.
-
Trim any extra fabric if needed and secure it with tape or glue on the back.
-
Close the frame and hang it on your wall.
✨ Encouragement: This project is perfect if you want quick results. In less than 10 minutes, you can create a piece of art that looks like something from a boutique store—only it’s more personal because you made it yourself.
3. Washi Tape Geometric Wall Design
Want to make your wall look like a modern art piece without even picking up a paintbrush? Washi tape is your new best friend! Washi tape is colorful, easy-to-use craft tape that comes in all kinds of patterns and shades. The best part? It peels right off without damaging your walls, so it’s perfect for renters or anyone who doesn’t want to commit to permanent paint.
This project lets you play with bold shapes—like triangles, diamonds, or zig-zags—to create your own geometric masterpiece. You can keep it simple with one or two colors, or go wild with a whole rainbow of designs. It’s like drawing with tape, and the results look super cool and modern.
Imagine turning a plain wall into a fun accent space in just an afternoon. Every time you walk into your living room, you’ll see your own artwork making the space brighter and more stylish.
What You Need:
-
Scissors
-
Measuring tape or ruler (optional, if you want neat lines)
-
Pencil (lightly mark if needed)
How To Do It:
-
Pick the wall you want to decorate. Start small, maybe with one section or a corner.
-
Choose your design—diamonds, stripes, or random intersecting lines all work great.
-
Lightly mark your lines with a pencil if you want them extra straight.
-
Stick the washi tape along your lines, pressing firmly as you go.
-
Step back, look at your design, and add more tape until it feels just right.
✨ Encouragement: Don’t worry if your lines aren’t perfect—imperfections give your design character! The fun of this project is that it’s easy to change. If you don’t like something, just peel the tape off and try again.
4. Nature-Inspired Pressed Leaf Frames
If you love bringing the outdoors inside, this project is for you! Pressed leaf art is a simple way to add a natural, calming touch to your living room walls. Each leaf is unique, which makes your artwork one-of-a-kind. It’s also a great reminder of the beauty that’s all around us—right outside your front door.
You can collect leaves from your backyard, a park, or even during a walk. Look for interesting shapes, like ferns, maple leaves, or anything that catches your eye. Once pressed, they look elegant and timeless when framed. You can hang one large leaf on its own or group a few smaller ones together for a stunning gallery effect.
This project is not only budget-friendly but also meaningful. Every time you see your framed leaves, you’ll remember the walk or moment when you picked them up. It’s a piece of art with a story behind it.
What You Need:
-
Fresh leaves (flat ones work best)
-
Heavy books for pressing (or a flower press if you have one)
-
Parchment paper or plain paper
-
Picture frames with glass fronts
-
Scissors (if trimming paper or stems)
How To Do It:
-
Collect your leaves. Pick ones that aren’t too thick and that lay flat easily.
-
Place each leaf between two sheets of parchment or plain paper.
-
Slide the paper inside a heavy book and stack more books on top. Leave for 1–2 weeks until the leaves are completely flat and dry.
-
Once pressed, carefully place the leaves inside your picture frame. You can use white or colored paper as a background.
-
Close the frame and hang it up for a natural, earthy piece of wall art.
✨ Encouragement: This project is all about slowing down and appreciating nature. Each framed leaf is like a little piece of outdoor beauty frozen in time—simple, elegant, and totally free.
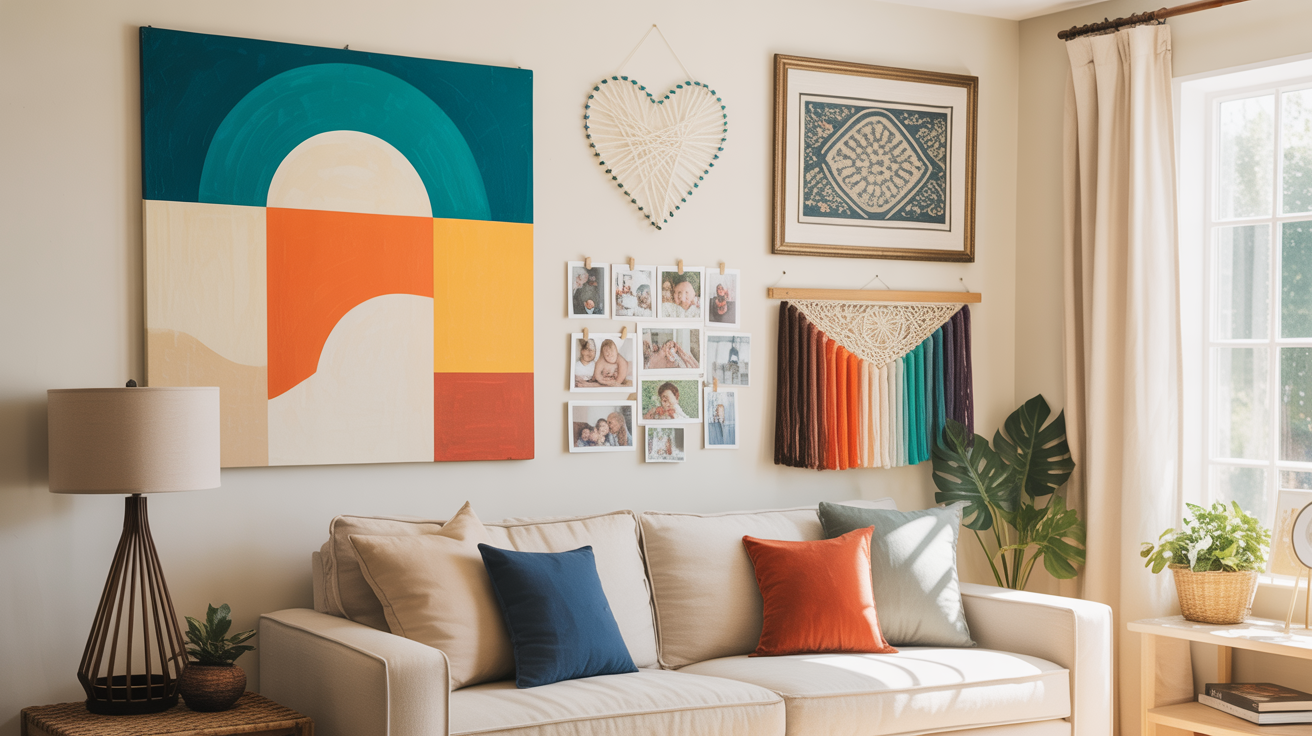
5. Photo Collage Wall
Nothing makes a living room feel more personal than filling it with your favorite memories. A photo collage wall is a fun way to show off the people, pets, and places you love most. Instead of keeping pictures hidden away on your phone, you can turn them into a big piece of wall art that makes you smile every day.
The best part is you can design it any way you want. Some people like neat, straight rows for a clean look. Others prefer a free-style “puzzle” collage with photos arranged randomly for a more casual, cozy vibe. You can even mix in postcards, magazine clippings, or little quotes for extra inspiration.
Every time you or a guest looks at your collage, you’ll get a glimpse of the moments that matter most. It’s more than just decoration—it’s a story on your wall.
What You Need:
-
Printed photos (mix of sizes is fun)
-
Poster board or corkboard (if you want a base)
-
Tape, glue, or sticky tack
-
Optional: string lights, washi tape, or mini clothespins for hanging
How To Do It:
-
Pick out your favorite photos. Try mixing old memories with new ones.
-
Decide on a layout. Do you want a grid, rows, or a free-flowing shape?
-
Lay the photos on the floor first to play with the arrangement before putting them on the wall.
-
Use tape, glue, or pins to attach the photos to your board—or stick them directly on the wall with removable tape.
-
Add extra touches like string lights or washi tape frames for a cozy, creative look.
✨ Encouragement: Don’t stress about making it perfect—your photo wall should feel fun and personal. Think of it as a big scrapbook that keeps growing with your favorite memories.
6. DIY String Art
If you’re looking for a project that’s simple but looks super impressive, string art is the way to go! With just a piece of wood, some nails, and string, you can create designs that look like they came straight out of a trendy craft shop. The best part? You can make any shape you want—hearts, stars, initials, or even simple geometric patterns.
String art is also a great conversation starter. Imagine someone walking into your living room and asking, “Where did you get that?” You’ll get to smile and say, “I made it!” Plus, it’s really relaxing to do—wrapping the string around the nails feels almost like doodling, but with thread.
This project is perfect if you want wall art that feels both crafty and modern. It adds texture and color to your walls in a way that’s fun and playful.
What You Need:
-
A wooden board (smooth and sanded)
-
Small nails or push pins
-
Hammer
-
Printed template (optional, if you want a specific shape)
-
Tape (to hold the template in place)
How To Do It:
-
Choose your design. A simple heart, star, or your first initial is a great place to start.
-
Tape your paper template onto the wooden board.
-
Hammer small nails along the outline of your design, leaving the tops sticking out a bit.
-
Gently tear away the paper template.
-
Tie your string to one nail and start wrapping it around the others, criss-crossing until the shape is filled in.
-
Keep going until you like how it looks, then tie off the string and trim the ends.
✨ Encouragement: Don’t worry if your lines overlap or look uneven—that’s what makes string art so cool. Every design ends up being totally unique, just like you.
7. Painted Wooden Signs
Painted wooden signs are a classic DIY project that never goes out of style. They add a warm, rustic touch to your living room and can carry a message that makes you smile every time you see it. You can paint a favorite quote, your family’s last name, or even a simple word like Home, Love, or Joy.
The beauty of wooden signs is that they fit almost any style. If your living room is cozy and farmhouse-inspired, try painting your sign in neutral colors with a distressed look. If your space is modern, go for bold fonts and bright colors. No matter what, it will feel personal and meaningful because you made it.
This project is also great for beginners because it doesn’t require perfect painting skills. Stencils can help keep your letters neat, and a little bit of “imperfection” makes handmade signs even more charming.
What You Need:
-
A wooden board (smooth, or sanded if rough)
-
Acrylic paint (choose colors that match your living room)
-
Paintbrushes (one wide, one small for details)
-
Letter stencils (optional, for clean lettering)
-
Painter’s tape (optional, for straight lines)
-
Clear sealer (spray or brush-on, optional, to protect your work)
How To Do It:
-
Pick your word, phrase, or design. Shorter is easier if it’s your first time.
-
Paint the background of your wooden board and let it dry.
-
Use stencils (or freehand if you’re confident) to add your letters or design.
-
Fill in with paint, making sure to apply in thin, even layers.
-
Once dry, you can lightly sand the edges for a rustic look or leave it smooth for modern style.
-
(Optional) Seal your sign with a clear coat to protect it.
-
Hang it up or lean it on a shelf in your living room.
✨ Encouragement: Wooden signs are all about expressing what matters most to you. Whether it’s a word that inspires you or a phrase that makes you laugh, your handmade sign will bring a little extra heart to your living room.
8. Mason Jar Lid Mini Art Gallery
Who knew those little mason jar lids could turn into adorable wall art? With just a few supplies, you can create a mini gallery that’s fun, unique, and full of personality. Each lid becomes a tiny frame, and when you group several together on your wall, it looks like a creative art installation.
The best part is you can fill each lid with something different—fabric scraps, patterned paper, small photos, or even tiny dried flowers. It’s a playful project that lets you experiment and mix-and-match without needing to commit to one big design. Plus, since the lids are small, they’re quick to make and perfect if you want instant results.
This project is great for adding charm to a smaller wall space, like above a side table or around a bookshelf. It’s affordable, beginner-friendly, and the kind of craft that makes people smile when they see it.
What You Need:
-
Mason jar lids (any size, but smaller ones are extra cute)
-
Scrap fabric, patterned paper, or small photos
-
Scissors
-
Glue or Mod Podge
-
Command strips or double-sided wall tape (for hanging)
How To Do It:
-
Collect your mason jar lids and clean them well.
-
Cut out fabric, paper, or photos to fit neatly inside the lid.
-
Glue your chosen piece into the lid and let it dry.
-
Make several different designs so you have a variety.
-
Arrange them on the wall in a cluster, like a mini gallery.
-
Use command strips or tape to stick them in place.
✨ Encouragement: Don’t be afraid to mix patterns and colors—the more variety, the more fun your mini gallery will look! Each lid is like a tiny piece of art that shows off your creativity.
10. DIY Wall Hanging with Yarn or Rope
Wall hangings made with yarn or rope are cozy, stylish, and surprisingly simple to make. They bring a soft, textured look to your living room and work with so many styles—from boho and rustic to modern and minimalist. You don’t need weaving skills or expensive tools to make one; just some yarn, a stick or dowel, and a little patience.
This project is fun because it’s so customizable. You can keep it simple with just one color of yarn, or mix in a few shades for a gradient effect. Want extra charm? Add beads, tassels, or knots for a unique look. Once it’s hung, it adds instant warmth and makes your wall feel more inviting.
What You Need:
-
Yarn or rope (cotton yarn works great, but any kind will do)
-
A wooden dowel, stick, or branch
-
Scissors
-
Optional: beads or feathers for decoration
How To Do It:
-
Cut several pieces of yarn to the same length (longer pieces give a fuller hanging).
-
Fold each piece in half, then loop it over your dowel or stick, pulling the ends through the loop to secure.
-
Continue until your stick is filled with yarn pieces.
-
Trim the bottom into a straight edge, V-shape, or diagonal design.
-
Add extra details like knots, braids, or beads if you’d like.
-
Hang your creation on the wall with string or nails.
✨ Encouragement: Your yarn wall hanging doesn’t need to look perfect. The beauty is in the texture and the handmade feel. Every strand you hang is a little piece of your creativity on display.
Conclusion
And there you have it—10 DIY wall art projects that can transform your living room from plain to personal without breaking the bank. The best part is that you don’t need fancy tools, a big budget, or professional art skills to get started. Each project is simple, fun, and completely customizable to fit your style.
Remember, wall art isn’t just about decoration—it’s about making your home feel like your home. A bright abstract painting can bring energy to your space. Pressed leaves or yarn hangings can add calm and coziness. A photo collage wall tells your story through memories, while a wooden sign or oversized quote keeps inspiration front and center.
The key is to pick one project that excites you and just start. Don’t worry about perfection—every brushstroke, knot, or taped line is part of what makes your creation unique. Even the simplest DIY can bring so much joy when you see it hanging proudly in your living room.
If you enjoyed these ideas, be sure to check out my other DIY craft posts for more beginner-friendly projects. From recycled crafts to seasonal decorations, there are plenty of fun ways to get creative and make your home feel extra special.
So grab your supplies, trust your creativity, and let your walls tell your story. You’ll be surprised at how much warmth and personality a little DIY art can add to your everyday life.