
This post may contain affiliate links, which means that as an Amazon Associate, I earn from qualifying purchases. This helps support our website and allows us to continue providing content for our readers. The use of artificial intelligence in crafting content is aimed at enhancing creativity and providing engaging material tailored to your interests. Our AI tools help generate creative ideas while ensuring all recommendations are genuine and in line with our values for crafting and family-friendly activities. Thank you for your support and for being a part of our community!
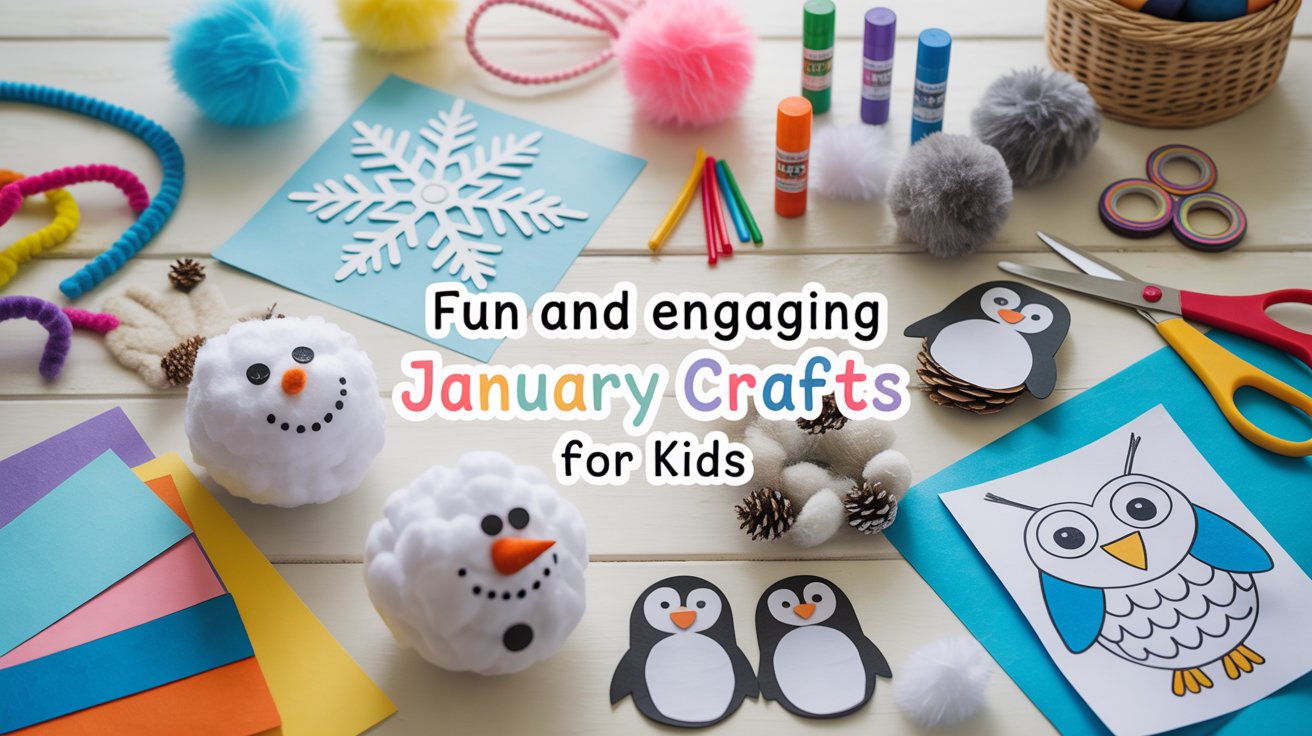
The winter months can be challenging for keeping kids entertained indoors. With chilly weather keeping outdoor activities at bay, the desire to engage kids with crafting fun becomes paramount. Say goodbye to those winter blues with these engaging and creative January crafts for kids. From fluffy materials to sparkling textures and frosty color palettes, this list promises to turn any dull day into an adventurous crafting retreat.
1. Glittery Snowflake Ornaments

Creating glittery snowflake ornaments is a magical and easy craft perfect for kids and adults alike. These sparkling decorations can add a festive touch to any holiday decor or tree.
Materials Needed:
- Pipe cleaners (preferably white or silver)
- Clear-drying craft glue or a glue gun
- Fine glitter (in silver, white, blue, or any color of choice)
- Ribbon or string for hanging
- Scissors
- Tray or newspaper (to catch excess glitter)
Instructions:
- Form the Snowflake:
- Begin by twisting three pipe cleaners together at the center to form a six-pointed star or snowflake shape.
- Apply Glue:
- Apply glue along the surface of each pipe cleaner arm. You can use a paintbrush for even application if using craft glue, or directly apply if using a glue gun.
- Add Glitter:
- On a tray or over newspaper, generously sprinkle glitter on each glued surface. Rotate and sprinkle until fully covered. Tap off excess glitter onto the tray for reuse.
- Attach Hanging Loop:
- Cut a 6-8 inch piece of ribbon or string. Form a loop and attach it to one of the snowflake’s arms using glue or by twisting it into place.
- Let Dry:
- Allow the ornament to dry completely in a safe area before handling.
Dos & Don’ts:
- Do ensure glue is spread evenly for full glitter coverage.
- Do work over a tray to reuse excess glitter.
- Don’t rush the drying process; ensure ornaments are fully dried before hanging.
- Don’t use hot glue unsupervised if kids are crafting.
This craft combines the joy of creating with the whimsical sparkle of winter, making it an ideal project for festive occasions.
2. Charming Winter Scene Jars
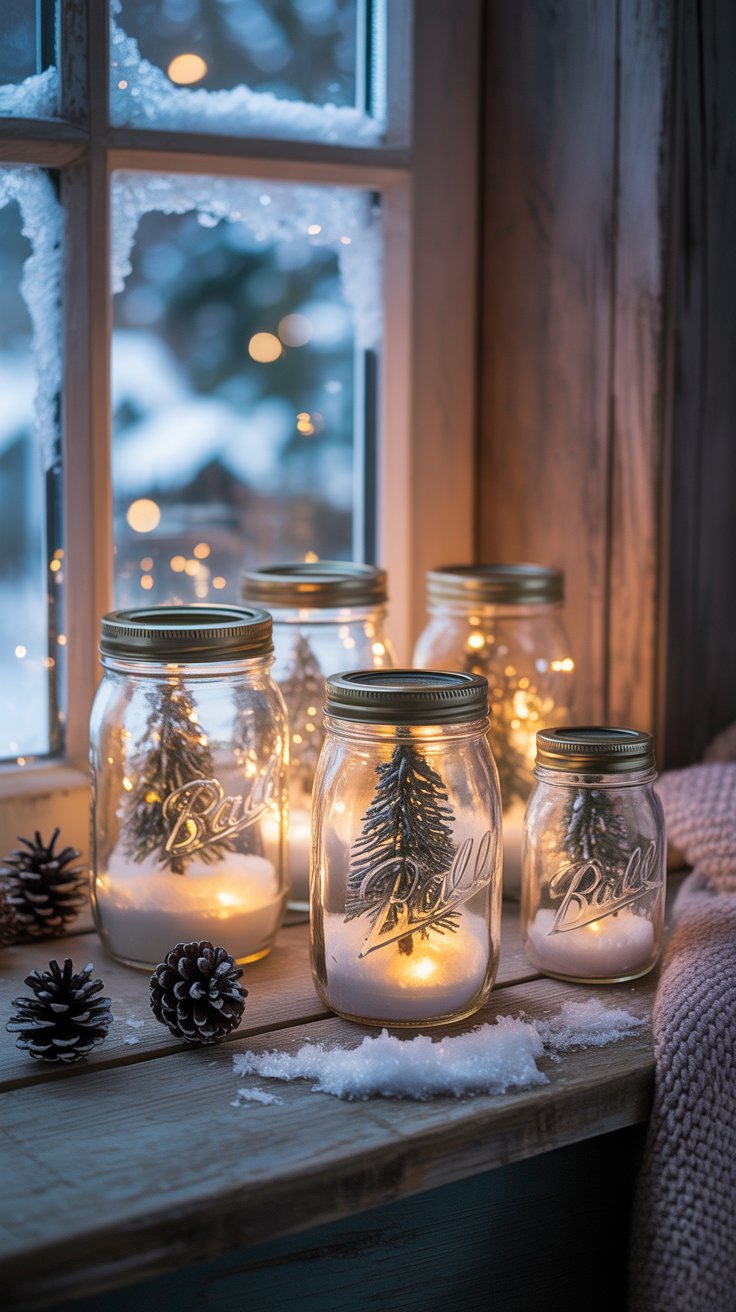
There’s just something magical about creating your own little world inside a jar — especially in the winter. These Charming Winter Scene Jars are one of the easiest ways to bring instant holiday coziness into your home. With just a few simple supplies like clear glass jars, fluffy faux snow, and the cutest miniature trees, you can build a dreamy winter wonderland right on your windowsill. They catch the light beautifully during the day, and at night? Add a tiny LED tealight and the whole scene glows like a peaceful snowy village.
These jars are perfect for kids, crafters, or anyone who wants a quick project that looks high-end with almost no effort. Whether you make one or create a whole row of them, they instantly make any space feel festive, warm, and charming.
- Shop Glass Jars
- Faux Snow
- Miniature Trees
- LED Tealights
Instructions:
- Prepare the Jar:
- Start with a clean and dry glass jar. Remove any labels and residue so the glass is clear.
- Add Faux Snow:
- Place a layer of faux snow or cotton batting at the bottom of the jar. This will serve as the snowy ground for your scene. Adjust the quantity based on the depth of the jar and the desired look.
- Insert Miniature Trees and Figurines:
- Arrange miniature trees and any additional figurines you wish to include. Use tweezers for precise placement. Ensure the elements are stable in the faux snow.
- Add Lighting:
- Place an LED tealight inside the jar to illuminate your scene. Position it so that the light evenly enhances the entire scene setup.
- Secure the Lid:
- Once satisfied with your arrangement, securely close the jar with its lid. For a decorative touch, tie a ribbon or twine around the lid.
- Finishing Touches:
- If desired, embellish the outside of the jar with additional decorations, such as small star stickers or a bow.
Dos & Don’ts:
- Do clean the jars before crafting to ensure clarity.
- Do use LED tealights instead of real candles for safety.
- Don’t overcrowd the jar; keep the scene simple and elegant.
- Don’t fill with too much snow—just enough to cover the base.
With these simple steps, you’ll have a beautiful winter wonderland in a jar, perfect for decorating your home or giving as a thoughtful handcrafted gift.
- Prepare the Jar:
3. Cozy Mittens Puppets

There’s something so heart-melting about turning simple craft supplies into characters that come to life, and these Cozy Mittens Puppets are exactly that kind of magic. Using soft felt, bright yarn, and a sprinkle of imagination, you can transform ordinary mittens into playful little friends kids will adore. The vibrant colors make them eye-catching, the textures are wonderfully soft for tiny hands, and the creative possibilities are endless — from silly monsters to friendly animals to cozy winter buddies. These puppets are a quick craft that instantly sparks giggles, storytelling, and hours of pretend play.
- Shop Felt Sheets
- Colorful Yarn
- Googly Eyes
- Fabric Glue
-
Instructions for Making Mitten Puppets:
- Prepare the Mittens:
- Start by choosing a pair of cozy mittens in a color that will serve as the base for your puppet. These can be old or spare mittens lying around.
- Gather the Materials:
- Collect soft felt, colorful yarn, googly eyes, and fabric glue. Prepare any additional decorative items like buttons or small fabric pieces for features.
- Cut and Design:
- Cut felt into shapes for the face, ears, or any other features you want to add to the puppet. Think creatively about whether you are making animals, monsters, or winter characters.
- Assemble the Puppet:
- Attach the felt pieces to the mitten using fabric glue. Add yarn for hair or whiskers and googly eyes for personality.
- Drying Time:
- Allow the glue to dry completely before use to ensure all pieces are securely attached.
- Finishing Touches:
- Once dry, add any final decorative touches and ensure each puppet is uniquely personalized with names or additional details.
Dos & Don’ts:
- Do pre-cut mitten shapes for ease of assembly.
- Do help children come up with creative design ideas to personalize their puppets.
- Don’t overuse glue as excessive amounts can be messy and take longer to dry.
- Don’t forget to personalize each puppet with unique features to make them special.
These puppets are a delightful and imaginative craft that provides endless opportunities for play and storytelling.
- Prepare the Mittens:
4. Painted Pine Cone Owls
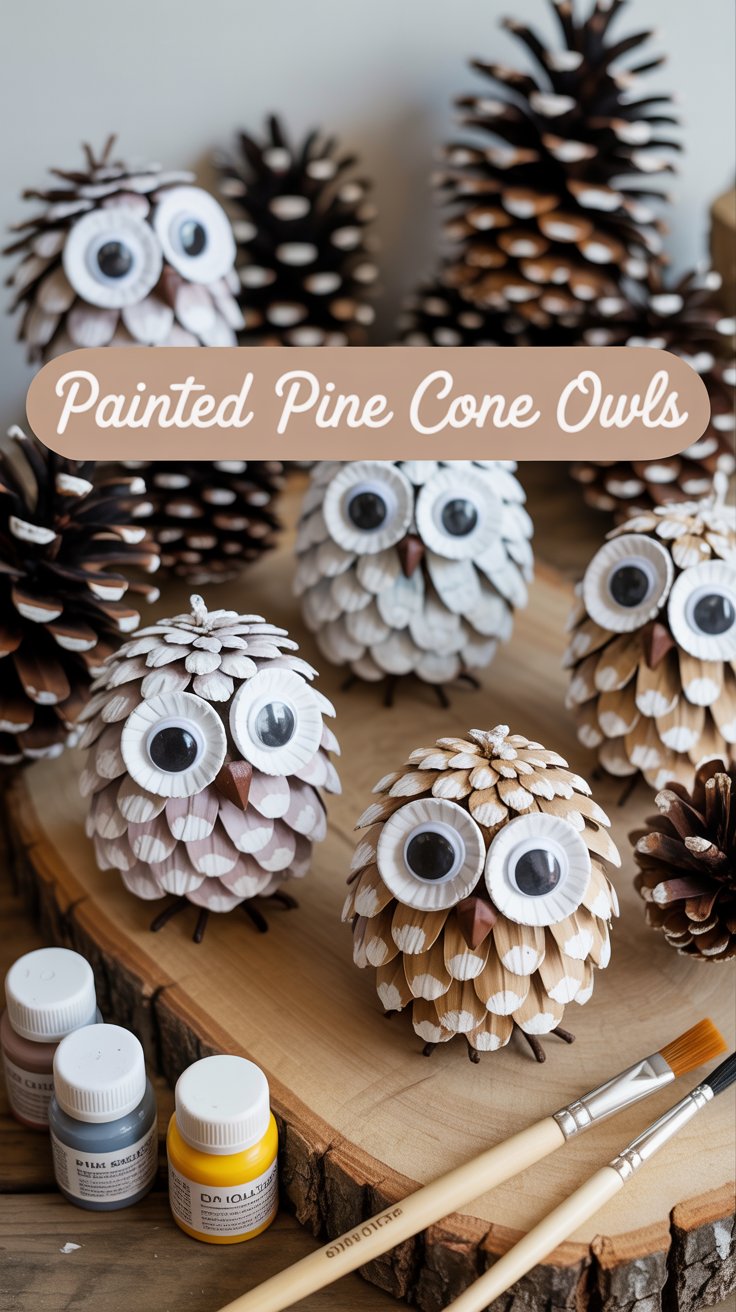
Transforming simple pine cones into adorable snowy owl figures is one of those crafts that instantly feels magical. With just a bit of white and beige paint, you can turn an ordinary natural element into a charming little woodland friend. The soft, wintry colors give each owl a whimsical, snowy look — perfect for creating a cozy winter scene on your mantel, bookshelf, or even as part of a holiday centerpiece. Kids will love how quickly these little owls come to life, and adults will appreciate how beautifully they blend with neutral winter décor.
Instructions for Making Painted Pine Cone Owls:
- Gather Pine Cones:
- Start with clean and dry pine cones. Brush off any debris to ensure a smooth painting surface.
- Prepare the Painting Area:
- Cover your work area with newspaper or a plastic sheet to protect it from paint spills.
- Paint the Pine Cones:
- Use white and beige acrylic paint to gently coat the pine cones. Apply the paint using light strokes with a paintbrush, ensuring to reach between the scales for uniform coverage.
- Attach Features:
- Once the paint is dry, add googly eyes to the pine cone using a glue gun or craft glue. Cut small pieces of felt for the owl’s beak and wings, attaching them securely.
- Add Final Touches:
- Once all elements are attached and the paint is fully dry, you can add additional embellishments like small feathers or glitter for extra character.
- Shop Pine Cones
- Acrylic Paint Set
- Paintbrushes
- Googly Eyes Dos & Don’ts: Do prepare a painting area. Don’t overuse paint. Do allow each layer to dry. Don’t use paint without adult supervision.
5. Whimsical Beaded Snowflakes
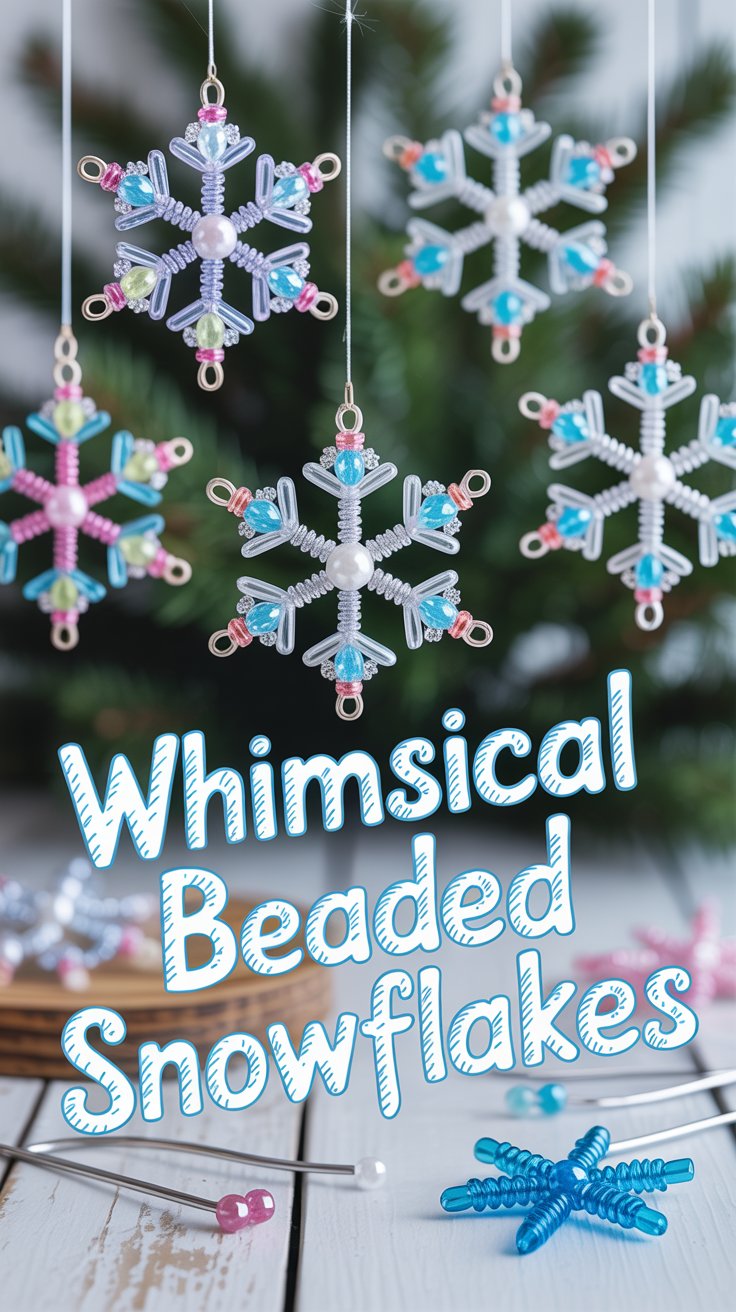
Crafting delicate snowflakes from beads and pipe cleaners is such a sweet way to blend creativity with a little hands-on precision. These beaded snowflake ornaments sparkle beautifully in the light and give kids the chance to explore patterns, colors, and fine motor skills all at once. With just a handful of beads and some bendable pipe cleaners, little hands can twist, thread, and shape their very own winter masterpieces. They’re quick to make, endlessly customizable, and look absolutely magical hanging in a window or on the Christmas tree.
Instructions for Making Beaded Snowflakes:
- Prepare Pipe Cleaners:
- Cut pipe cleaners into equal lengths to form the arms of the snowflake. Typically, three pieces of about 5-6 inches work well.
- Shape the Snowflake:
- Twist the pipe cleaners together at the center to form a six-pointed star shape. Make sure each arm is evenly spaced out.
- Thread the Beads:
- Begin threading beads onto each arm of the snowflake. Allow kids to choose different colors and patterns to explore creativity and symmetry.
- Secure the Ends:
- Once all beads are in place, fold over the ends of each pipe cleaner to secure the beads and prevent them from sliding off.
- Finishing:
- Make sure all beads are snug and that none are loose. Adjust the arms to achieve the desired snowflake shape.
These beaded snowflake ornaments are delightful additions to holiday decor, showcasing lights and colors beautifully.
- Shop Beads
- Pipe Cleaners
- Craft Wire
- Wire Cutters Dos & Don’ts: Do experiment with colors. Don’t force beads onto wires. Do inspire kids with patterns. Don’t forget to make it a gentle activity due to small parts.
6. Cozy Fleece Blanket Forts
There’s nothing more magical for kids than creating their very own little world, and this Cozy Blanket Fort Hideaway delivers all the snuggly vibes. With soft fleece blankets draped just right and a sprinkle of warm LED lights, you can transform an ordinary corner of the house into the ultimate snuggle zone. It’s the perfect spot for storytelling, quiet reading, movie moments, or dreamy afternoon escapes. The gentle glow of the lights mixed with the softness of the blankets creates a space that feels safe, warm, and full of imagination — a tiny getaway right inside your home.
Instructions for Making a Cozy Blanket Fort Hideaway:
- Choose the Location:
- Select a suitable corner or area of the room where the fort will not obstruct movement. Ensure it’s near an outlet if you plan to use LED lights.
- Set Up the Base:
- Use furniture like sofas, chairs, or tables as the base structure for the fort. Arrange them to create the desired shape, such as a square, rectangle, or L-shape.
- Drape the Blankets:
- Drape soft fleece blankets over the furniture to form walls and a roof. Secure the edges by tucking them in or using clothespins to hold them in place.
- Add Comfort Inside:
- Layer additional blankets or pillows on the floor inside the fort for a comfortable and inviting space. Ensure there is enough room to sit or lay down comfortably.
- Install LED Lights:
- String warm LED lights along the inside of the fort. Secure them with adhesive hooks or tape to create a magical glow. Ensure the power source is accessible and safe.
- Create an Entrance:
- Leave an opening for easy access in and out of the fort. You can use a blanket as a door for added coziness.
- Personalize the Space:
- Add books, toys, or a tablet for movies to enjoy the fort fully. Personalize it with stuffed animals or decor to make it a special retreat.
This cozy fort hideaway is perfect for imaginative play, quiet time, or simply enjoying a magical retreat in the comfort of your home.
- Shop Fleece Blankets
- LED Fairy Lights
- Decorative Pillows
- Floor Cushions Dos & Don’ts: Do ensure a safe setup. Don’t cover lights with blankets. Do make it a group activity. Don’t leave lights unattended.
7. Frosty Window Clings
Bring a touch of winter magic indoors with homemade frosty window clings — a craft that feels just as enchanting as the real thing. With nothing more than clear glue and a few drops of food coloring, kids can create icy patterns, swirling snowflakes, or sparkling frost designs that stick right onto the glass. It’s a hands-on project that blends creativity with sensory fun, and the finished clings look absolutely stunning when the sunlight shines through. Whether you cover the whole window or add just a few whimsical touches, these frosty creations instantly make your home feel wintry, bright, and full of holiday charm.
Instructions for Making Frosty Window Clings:
- Prepare the Work Area:
- Lay down newspaper or a protective sheet on the work area to catch any drips and keep the area clean.
- Mix Glue and Coloring:
- In a small bowl, mix clear craft glue with a few drops of food coloring. Stir to achieve the desired shade. Light blue or white with iridescent glitter works well for a frosty look.
- Create Designs:
- Using a plastic sheet or wax paper as a base, use a paintbrush or squeeze bottle to create icy patterns, snowflakes, or other designs with the colored glue mixture.
- Let Dry:
- Allow designs to dry completely. This may take several hours or overnight, depending on the thickness of the glue layer.
- Peel and Apply:
- Once dry, carefully peel the glue clings from the plastic sheet or wax paper. Apply them onto a window by gently pressing them to adhere.
These frosty window clings are a perfect winter craft that lets kids explore creativity and add a touch of seasonal charm to your home
- Shop White Glue
- Food Coloring
- Plastic Sleeves
- Cotton Swabs Dos & Don’ts: Do cover all work areas. Don’t use too much coloring. Do encourage unique designs. Don’t apply clings to freshly cleaned windows.
8. Festive Yarn Snowmen
Transform simple yarn into charming snowmen bursting with holiday cheer! These Festive Yarn Snowmen offer the perfect blend of creativity and fun, as children eagerly shape, wrap, and decorate their creations. With their looped textures and vibrant wintery colors, these yarn snowmen bring delightful joy and cozy warmth to any indoor scene. Ideal for developing fine motor skills in little hands while fostering imagination, they make adorable decorations for the holiday season—perfect for mantels, tabletops, or even as unique handmade gifts.
Instructions for Making Festive Yarn Snowmen:
- Gather Materials:
- Collect white yarn, a pom pom maker, felt fabric sheets, craft glue, black beads or small buttons, and orange felt or paper for the nose.
- Create Yarn Balls:
- Use a pom pom maker to form two white pom poms in different sizes for the snowman’s body and head. Alternatively, you can roll yarn around your fingers until you reach the desired size and tie the center tightly with additional yarn.
- Assemble the Snowman:
- Attach the smaller pom pom (head) to the larger one (body) using craft glue. Let it dry completely to ensure they are securely joined together.
- Add Features:
- Using felt, cut small round pieces for eyes and a triangle for the carrot nose, then glue these onto the head. Optionally, use black beads or small buttons for eyes and buttons down the front.
- Decorate:
- Create a tiny scarf or hat from leftover felt and wrap it around the snowman’s neck or place it on the head for an extra festive touch.
- Final Touches:
- Allow all glued parts to dry thoroughly. Position your snowmen among other holiday decorations as charming festive accents.
These Festive Yarn Snowmen are not only easy to make but bring a personalized, handmade touch to holiday celebrations.
- Shop White Yarn
- Pom Pom Maker
- Felt Fabric Sheets
- Craft Glue Dos & Don’ts: Do help tie knots securely. Don’t use yarn that’s too thin. Do add cute accessories like scarves. Don’t leave small accessories unsupervised.
9. Musical Jingle Bell Bracelets
Infuse rhythm and color into your playtime with delightful Musical Jingle Bell Bracelets. These bracelets are not just a craft project but a source of endless musical fun and exploration. Easy to fasten and customizable with various colorful beads and shiny bells, they encourage children to create their own music while fostering creativity and coordination. Perfect for group crafting sessions or individual play, these bracelets tick all the boxes for an engaging and interactive experience.
Instructions for Making Musical Jingle Bell Bracelets:
- Gather Materials:
- Collect jingle bells, colorful beads, stretchy elastic cord, and scissors. Ensure all materials are child-friendly and safe.
- Cut Elastic Cord:
- Measure and cut a length of elastic cord that comfortably fits around the wrist, adding a couple of extra inches for tying.
- Thread Beads and Bells:
- Begin threading the beads and jingle bells onto the cord in your desired pattern. Incorporate a mix of beads and bells to achieve a balanced and musical design.
- Tie the Bracelet:
- Once you have reached the desired length, knot the ends of the elastic cord securely. Ensure the knot is tight to prevent beads and bells from slipping off.
- Trim Excess Cord:
- Carefully trim any excess cord near the knot for a neat finish, ensuring not to cut too close to the knot to prevent unraveling.
- Test and Enjoy:
- Test the bracelet to ensure it fits well and jingle with ease. Encourage kids to shake, dance, and create rhythms with their new musical accessory.
These Musical Jingle Bell Bracelets are a joyful addition to any playtime, providing opportunities for both crafting and music-making.
- Shop Jingle Bells
- Elastic Cord
- Beads
- Scissors Dos & Don’ts: Do secure knots tightly. Don’t leave kids alone with scissors. Do encourage creating different rhythms. Don’t use cords that are too stretchy.
10. Puffy Paint Snowman Art
Infuse your home with a touch of winter magic by creating homemade frosty window clings. This delightful craft project allows kids to explore their artistic sides while engaging in sensory fun. Using only clear glue and food coloring, they can craft icy patterns, swirling snowflakes, and sparkling frost designs that beautifully cling to glass. When the sunlight filters through these frosty creations, they cast a magical ambiance, adding wintry charm to any room. Perfect for brightening up windows during the cold season, these clings are both simple to make and enchanting to behold.
Instructions for Making Frosty Window Clings:
- Prepare Work Area:
- Cover your work surface with newspaper or a plastic sheet to protect it from any spills.
- Create Glue Mixture:
- In a small dish, mix clear school glue with a few drops of food coloring. Choose colors like light blue or white to mimic frost.
- Design the Clings:
- On a plastic sheet or piece of wax paper, paint your frosty designs using the colored glue. Create shapes like snowflakes or random frost patterns.
- Allow to Dry:
- Let the designs dry completely. This can take several hours, so it’s best to leave them overnight.
- Peel and Apply:
- Once fully dry, carefully peel the clings off the plastic sheet. Press them onto your window, smoothing out any air bubbles.
These Frosty Window Clings add a fun and decorative touch to any household and are an excellent winter activity for children to enjoy.
- Shop Puffy Paint
- Poster Board
- Paint Brushes
- Glitter Dos & Don’ts: Do cover surfaces to protect. Don’t mix colors too much. Do encourage textured explorations. Don’t let paint dry on brushes.
11. Ice-Crafted Crystal Sun Catchers
Capture the enchanting glimmer of winter sunlight with these stunning Ice-Crafted Crystal Sun Catchers. With just a few simple ingredients, you can transform ordinary water into dazzling ice masterpieces that sparkle and shine as they catch the light. Perfect for engaging children in a hands-on craft that combines science with creativity, these sun catchers bring a touch of winter magic to any window or outdoor space. Their radiant designs not only brighten up a cold day but also offer a fun and educational crafting experience for everyone involved.
Instructions for Making Ice-Crafted Crystal Sun Catchers:
- Gather Your Materials:
- Collect rock salt, water balloons, string, and cookie cutters. Ensure you have a spacious outdoor area or freezer for freezing.
- Fill the Balloons:
- Fill the water balloons with water and add a few tablespoons of rock salt to each. Knot the balloons to seal them.
- Freeze the Balloons:
- Place the filled balloons outdoors if temperatures permit, or in a freezer. Allow them to freeze completely overnight.
- Create Sun Catcher Shapes:
- Once frozen, remove the balloons from the ice spheres. Position the cookie cutters on a flat surface and place an ice sphere inside each cutter. Let sit for a while to shape partially as it melts slightly.
- Add String for Hanging:
- Before the ice refreezes, make a small indentation and loop a piece of string through it. Allow the sun catcher to settle firmly around the string as it refreezes.
- Display Your Creations:
- Hang your sun catchers in a sunny window or from tree branches outside. Watch them sparkle beautifully in the sunlight.
These glimmering Ice-Crafted Crystal Sun Catchers offer a spectacular way to enjoy winter’s beauty and make a wonderful addition to any seasonal decor.
- Shop Rock Salt
- Water Balloons
- String
- Cookie Cutters Dos & Don’ts: Do use outdoor space for melting. Don’t use balloons without guidance. Do place in sunny windows. Don’t handle without gloves when frozen.
12. Cozy Sweater Sock Puppets
Breathe new life into old sweaters and socks by transforming them into adorable puppet characters! These Cozy Sweater Sock Puppets bring a playful and imaginative twist to crafting, inviting children and adults alike to explore their creativity through design and storytelling. Each puppet becomes a unique character ready to star in an impromptu puppet show or serve as a beloved toy. Not only do they provide hours of fun, but they also offer a wonderful opportunity to recycle materials and engage in eco-friendly crafting.
Instructions for Making Cozy Sweater Sock Puppets:
- Gather Materials:
- Collect old sweaters, socks, fabric scissors, needle and thread, and googly eyes. Additionally, prepare buttons, yarn, and other decorative materials for added features.
- Create the Puppet Base:
- Choose whether the sweater or sock will serve as the base for your puppet. Cut the fabric to an appropriate size, ensuring a comfortable fit on the hand.
- Design and Assemble Features:
- Use buttons, yarn, and scraps of fabric to create facial features like eyes, nose, and mouth. Sew or glue these elements onto the puppet base. Add yarn for hair or texture as desired.
- Attach Decorative Elements:
- Sew or glue decorative elements such as ears, arms, or accessories onto the puppet to enhance its character and personality.
- Complete the Puppet:
- Finish by securing all parts. Make sure all sewn pieces are tightly attached and glued elements are dry.
These Cozy Sweater Sock Puppets embody fun and creativity, making them the perfect addition to any child’s toy collection or a fantastic interactive display for storytelling.
- Shop Fabric Scissors
- Old Sweaters
- Needle and Thread
- Googly Eyes Dos & Don’ts: Do recycle materials. Don’t rush sewing. Do invent fun characters. Don’t leave needles as accessible play items.
13. Decorative Ice Lanterns
lluminate the winter night with mesmerizing Decorative Ice Lanterns that cast magical shadows and dazzling reflections. These enchanting lanterns are easy to craft and perfect for adding a touch of winter wonderland to your outdoor space. Using simple materials, you can create beautiful, glowing ice structures that capture and reflect light in unique ways, transforming ordinary spaces into a spectacular display of icy brilliance. Ideal for cold winter nights, these lanterns also make captivating centerpieces for holiday gatherings or serene decorations along walkways.
Instructions for Making Decorative Ice Lanterns:
- Gather Materials:
- Collect plastic cups or containers, outdoor LED candles, food coloring, and any small toys or shapes to embed in the ice.
- Prepare the Mold:
- Fill the plastic cups or containers with water. Add a few drops of food coloring to create a vibrant hue, and gently stir to distribute the color evenly.
- Add Decorations:
- Drop small toys or natural elements like leaves or berries into the colored water for added interest and texture.
- Freeze the Lanterns:
- Place the filled containers outdoors if temperatures permit, or in a freezer. Allow them to freeze completely, which may take several hours or overnight.
- Release the Ice:
- Once frozen, dip the containers quickly in warm water to loosen, and carefully slide out the ice lanterns.
- Place LED Candles:
- Insert outdoor LED candles into the hollows of the ice lanterns. Ensure the candles are safely positioned and won’t shift.
- Display:
- Arrange your lanterns outside on a clear, cold night. Witness the captivating glow and reflections as the light passes through the ice.
These Decorative Ice Lanterns bring ethereal beauty to your outdoor decor, making an unforgettable addition to the serene winter landscape.
- Shop Plastic Cups
- Outdoor LED Candles
- Food Coloring
- Small Toys or Shapes Dos & Don’ts: Do make colorful ice art. Don’t place too near heat. Do set out on cold nights. Don’t use real candles inside ice.
14. Nature-Inspired Leaf Art
Transform gathered winter leaves into stunning art pieces through simple painting techniques and imaginative layering. This craft activity encourages children and adults to connect with nature while exploring their creativity. By combining organic textures with vibrant colors, you can create beautiful, nature-inspired artworks that capture the essence of the season. Perfect for displaying as unique decor or giving as thoughtful gifts, these leaf artworks are a testament to the beauty of the great outdoors transformed into artistic expression.
Instructions for Making Nature-Inspired Leaf Art:
- Gather Materials:
- Collect an assortment of winter leaves during a nature walk. Ensure the leaves are clean and dry. You will also need paint sets, a sketch pad, paintbrushes, and a palette.
- Prepare the Work Surface:
- Set up a clean, covered workspace with enough room to spread out all your materials.
- Plan Your Design:
- Lay out the leaves on the sketch pad, experimenting with different arrangements to see what compositions you like best.
- Apply Paint:
- Using a paintbrush, apply a thin layer of paint to one side of each leaf. Use a variety of colors to create vibrant patterns and textures.
- Create Leaf Prints:
- Press the painted side of each leaf onto the sketch pad, gently smoothing it down to ensure an even print. Carefully lift the leaf to reveal a colorful impression.
- Layer and Combine:
- Repeat the process with different leaves and colors, layering the prints to create depth and complexity in your artwork.
- Final Touches:
- Allow the paint to dry completely before framing or displaying your finished piece.
This Nature-Inspired Leaf Art project is an excellent way to engage with the natural world creatively, turning simple leaves into breathtaking works of art.
- Shop Paint Sets
- Leaves
- Sketch Pads
- Paintbrushes Dos & Don’ts: Do collect leaves during walks. Don’t paint too thickly. Do explore patterns. Don’t forget drying time.
15. Quilted No-Sew Pillows
Create a snug and inviting space with these charming Quilted No-Sew Pillows, perfect for adding comfort and warmth during the winter months. These pillows are easy to craft and require no sewing skills, making them ideal for crafters of all ages. Using quilted fabric and simple materials, you can fashion cozy additions to your home decor that provide a personal touch and a splash of style. Whether it’s for a cozy reading nook or an extra layer of comfort on your couch, these pillows are as practical as they are delightful.
Instructions for Making Quilted No-Sew Pillows:
- Gather Materials:
- Collect quilted cloth, fabric glue, polyfill stuffing, and Velcro strips. Ensure the fabric is suitable for the desired pillow size.
- Cut the Fabric:
- Cut two pieces of quilted cloth to your preferred pillow size, leaving an extra inch around for seam allowance.
- Prepare the Edges:
- Lay the cloth pieces together, right sides facing out. Apply fabric glue along the edges, leaving one side open for stuffing. Press the edges together to form a strong bond.
- Stuff the Pillow:
- Once the glue has dried, carefully fill the pillow through the open side with polyfill stuffing, adjusting to achieve your desired firmness.
- Seal the Opening:
- Fold the open edges inward, apply fabric glue, and press together until secure. As an alternative, attach Velcro strips to the open end for a removable stuffing option.
- Add Finishing Touches:
- Allow all glued areas to dry completely before using the pillow. Feel free to add decorative elements like buttons or fabric paint for personalization.
These Quilted No-Sew Pillows deliver a touch of warmth and comfort to any room, making them a practical and stylish winter craft project.
- Shop Quilted Cloth
- Fabric Glue
- Polyfill Stuffing
- Velcro Strips Dos & Don’ts: Do ensure even stuffing. Don’t overstuff the pillows. Do select soft fabrics. Don’t skip pressing edges firmly.
Conclusion:
January is the perfect time to embrace the joys of crafting indoors, encouraging creativity and fun when the weather outside is chilly. Whether it’s dazzling ice lanterns, whimsical yarn snowmen, or musical jingle bell bracelets, each craft project offers an engaging way for kids to express themselves and explore new skills. These activities not only provide hours of entertainment but also enhance fine motor coordination, artistic expression, and imaginative play. By transforming simple materials into beautiful creations, children can experience the magic of making something with their own hands, fostering a sense of accomplishment and wonder. So gather your materials, let your imagination soar, and enjoy the delightful craft adventures this January has in store!
AI and Amazon Affiliate Disclosure
This post may contain affiliate links, which means that as an Amazon Associate, I earn from qualifying purchases. This helps support our website and allows us to continue providing content for our readers. The use of artificial intelligence in crafting content is aimed at enhancing creativity and providing engaging material tailored to your interests. Our AI tools help generate creative ideas while ensuring all recommendations are genuine and in line with our values for crafting and family-friendly activities. Thank you for your support and for being a part of our community!


6 Responses
Okay, so hot646ph…it appears to be a specific angle of hot646 for the Philippines? If you’re local, it might be the right spot to log in from hot646ph.
Heard some buzz about 11ttcom. Gave it a look and… yeah, it’s interesting. If you’re into this kinda thing, might be your cup of tea. My opinion? Judge for yourself: 11ttcom
Checked out rivalry.info. Seems to be more about the general idea of rivalry rather than a specific betting platform. So you know you can visit this site to get information on rivalry. Here is the link: rivalry