10 Fun and Easy DIY Crafts for Kids: Unleash Creativity at Home
Disclosure: This post contains affiliate links. That means if you make a purchase through one of my links, I may earn a small commission at no extra cost to you. Some products featured may have been provided by brands for testing. As an Amazon Associate, I earn from qualifying purchases. Portions of this content were created with AI support.
Introduction
There’s something magical about sitting down with kids and creating something from scratch. Not only does crafting spark their creativity and imagination, but it also helps develop fine motor skills, patience, and problem-solving—all while having a whole lot of fun. And let’s be honest, it’s also a wonderful way to unplug, slow down, and spend some quality time together.
The best part? These crafts don’t require fancy supplies or expensive kits. Most of the materials are probably things you already have lying around your home—like paper plates, buttons, or cardboard tubes. Whether you’re looking for a rainy-day activity, weekend project, or just something to keep little hands busy, these ideas are simple, affordable, and oh-so-fun.
Let’s dive into 10 easy DIY crafts for kids that the whole family will love!
1. Paper Plate Animals 🐵🦁
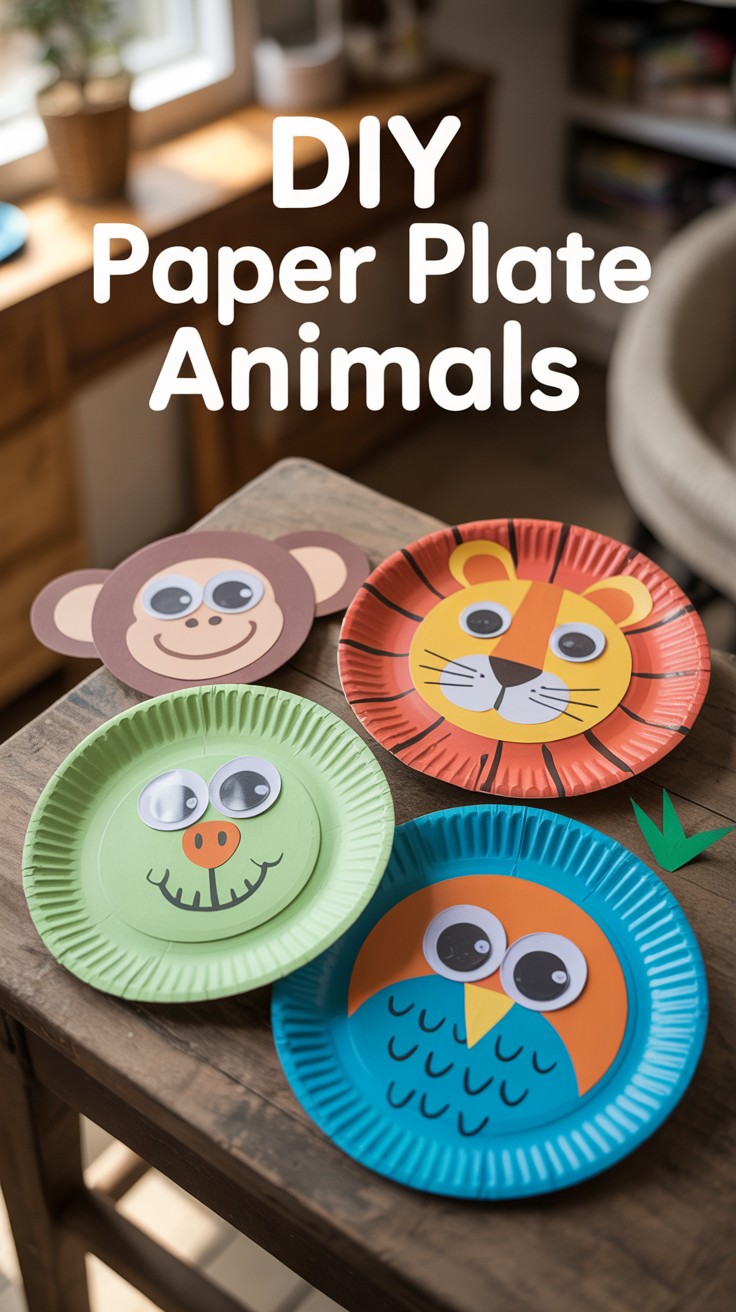
Who knew a simple paper plate could turn into a whole zoo of fun? These DIY Paper Plate Animals are a classic kids’ craft that never fails to spark creativity. Perfect for preschoolers and up, kids can transform everyday plates into lions, frogs, bunnies, or any creature they imagine — just add paint, paper, and googly eyes for a project that’s both adorable and easy.
Materials Checklist:
-
Paper Plates — sturdy white ones work best for painting
-
Acrylic Paint or Paint Pens — bright colors to bring animals to life
-
Colored Craft Paper — for ears, tails, and extra features
-
Googly Eyes — to give each animal personality
-
Glue Stick or Craft Glue — for attaching paper details
-
Scissors — for cutting shapes
How To:
-
Choose an Animal: Lions, pigs, frogs, owls — or invent your own!
-
Paint the Plate: Use bright acrylic paint as the base color. Let dry completely.
-
Add Details: Cut out ears, wings, or tails from colored paper.
-
Attach Features: Glue on the paper pieces, then add googly eyes and a smile.
-
Show It Off: Tape to the wall, turn into a mask, or create a whole jungle display!
Dos & Don’ts
Do use thick plates — they hold paint better.
Don’t over-saturate with glue; just a dab works fine.
Do mix and match colors for a playful zoo theme.
Don’t forget to let the paint dry before gluing on details!
Shop the Look:
2. Painted Rock Creatures 🎨
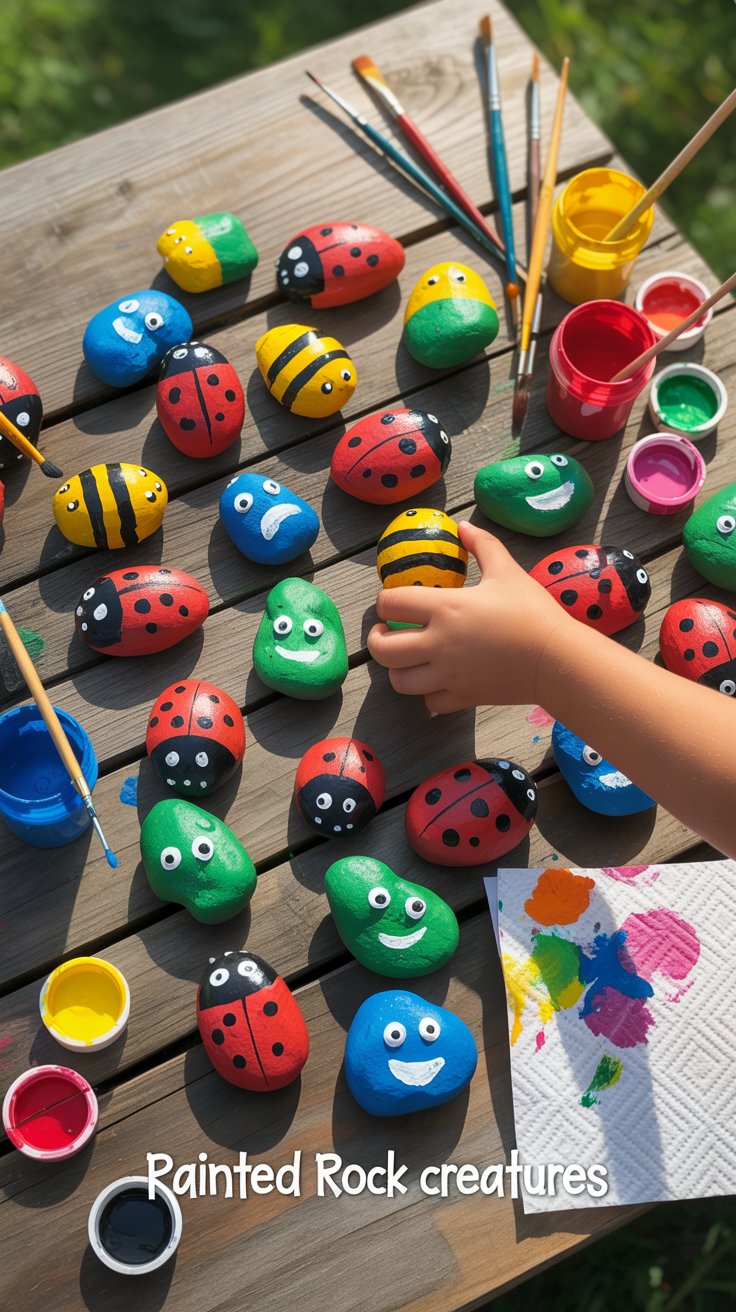
A little imagination and a few rocks can turn an ordinary day into an outdoor art adventure! Kids will love finding smooth stones and transforming them into colorful critters — from ladybugs and bumblebees to superheroes and friendly monsters. This easy craft blends creativity with nature and makes for adorable keepsakes or garden decorations.
Materials Checklist:
-
Smooth Rocks — collect outside or buy a polished set
-
Acrylic Paint or Paint Pens — bright colors work best for details
-
Paintbrushes — for painting and fine lines
-
Clear Sealant Spray — optional, to protect and shine your creations
How To:
-
Wash and dry your rocks so paint sticks smoothly.
-
Paint each rock into a fun character — try ladybugs, bees, or silly faces.
-
Let dry completely, then add extra details with paint pens.
-
Seal with spray for long-lasting color and shine.
Dos & Don’ts
Do use bright, contrasting colors for playful designs.
Don’t paint wet rocks — the paint won’t adhere.
Do let kids mix patterns and creatures for fun variety.
Don’t forget to sign their name and year on the back!
3. DIY Friendship Bracelets 💕
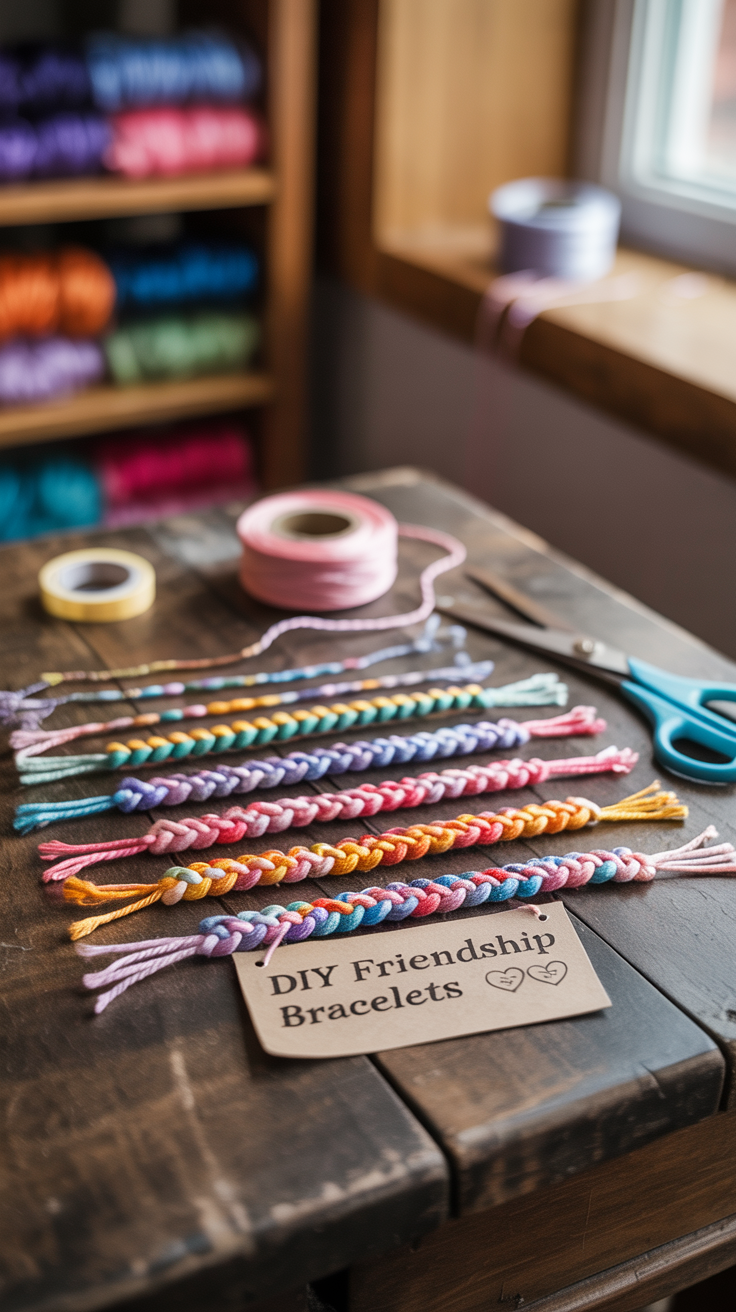
Nothing says “you’re my best friend” like a handmade bracelet! These colorful DIY Friendship Bracelets are a classic kids’ craft that never goes out of style. Whether it’s for classmates, siblings, or camp buddies, this project is all about creativity, patience, and love — and the results are so cute they’ll want to make dozens!
Materials Checklist:
-
Embroidery Floss or Craft Thread — choose bright or pastel color sets
-
Beads or Charms — add sparkle or personal flair
-
Scissors — for cutting thread
-
Tape or Clipboard — to hold the bracelet steady while braiding
-
Needle or Safety Pin (optional) — for beading or attaching charms
How To:
-
Pick Your Colors: Choose 3–6 strands of embroidery floss in your favorite shades. Cut each about 24 inches long.
-
Secure the Top: Tape the strands to a table or clip them to a clipboard so they stay in place.
-
Start Braiding or Knotting: Try simple braids or learn patterns like chevron or spiral designs.
-
Add Beads or Charms: Slide a few onto the strands as you go for extra fun details.
-
Finish with a Knot: Tie off the ends, trim any extra thread, and gift it to your best friend!
Dos & Don’ts
Do mix colors for bright, eye-catching designs.
Don’t pull the knots too tight — it can twist the bracelet.
Do make a few extras for trading or gifting.
Don’t forget to personalize with beads or initials!
Shop the Look:
4. Egg Carton Flowers 🌸
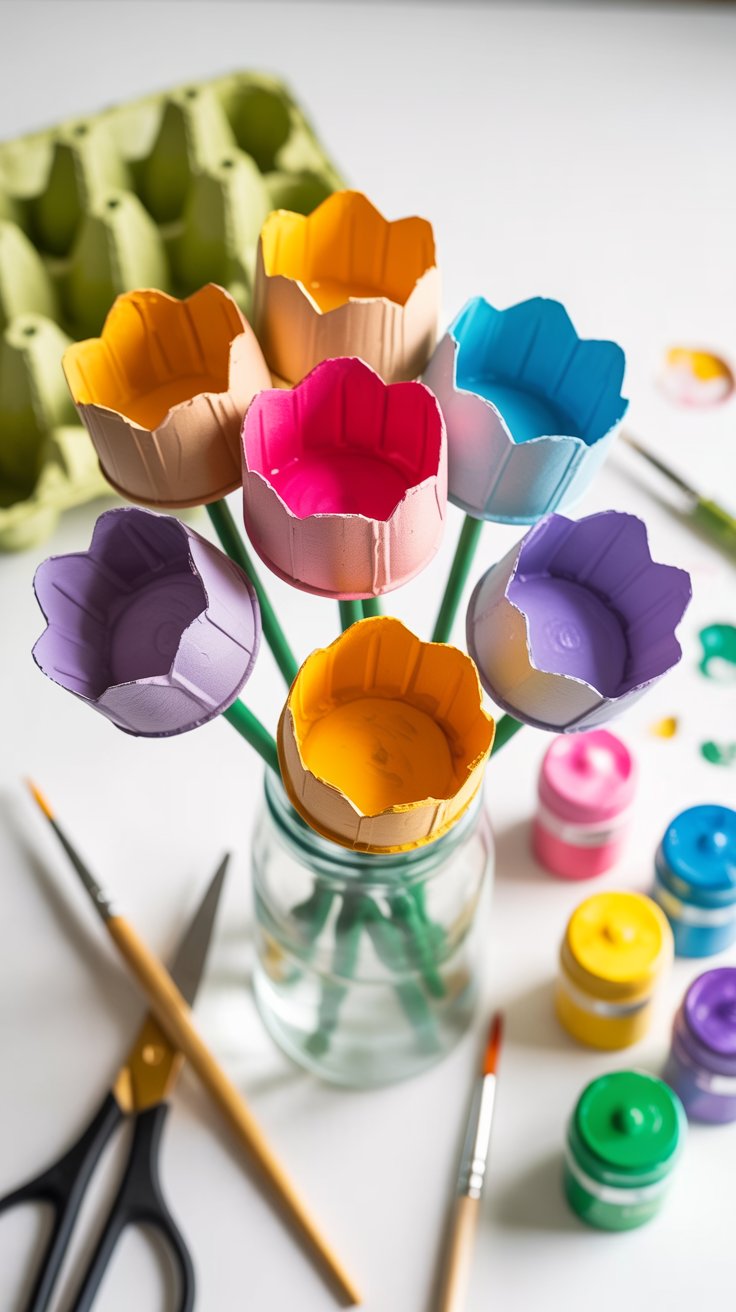
Don’t toss that egg carton! Cut the cups into flower shapes, paint them bright colors, and glue them onto craft sticks for a cheerful bouquet.
Turn your recycling into a blooming masterpiece! These adorable Egg Carton Flowers are an easy, eco-friendly craft that lets kids transform something ordinary into a work of art. Perfect for springtime or rainy-day creativity, they’ll love cutting, painting, and assembling their own bouquet — no watering required!
Materials Checklist:
-
Empty Egg Carton — paper style works best for painting
-
Acrylic Paint or Paint Pens — bright, cheerful colors
-
Paintbrushes — for both base color and details
-
Green Pipe Cleaners — to use as stems
-
Glue or Hot Glue Gun (with adult help) — to hold everything together
-
Scissors — for cutting out the flower cups
-
Buttons or Pom Poms — for cute flower centers
How To:
-
Cut the Cups: Carefully cut apart the egg carton so you have separate cups for each flower. Trim the edges into petal shapes.
-
Paint the Flowers: Let kids paint each cup in their favorite colors. Bright pinks, purples, and yellows make a cheerful bouquet.
-
Add the Center: Once dry, glue a button or pom pom in the center of each cup.
-
Attach the Stem: Poke a small hole in the bottom and thread a green pipe cleaner through — bend the end inside to secure.
-
Display Your Bouquet: Arrange the flowers in a recycled jar or wrap them with ribbon for a handmade gift.
Dos & Don’ts
Do use paper egg cartons — plastic ones won’t absorb paint.
Don’t skip drying time between paint colors.
Do let kids create their own color combos.
Don’t forget to label their creations with their name and date!
5. Toilet Paper Roll Binoculars 🔭
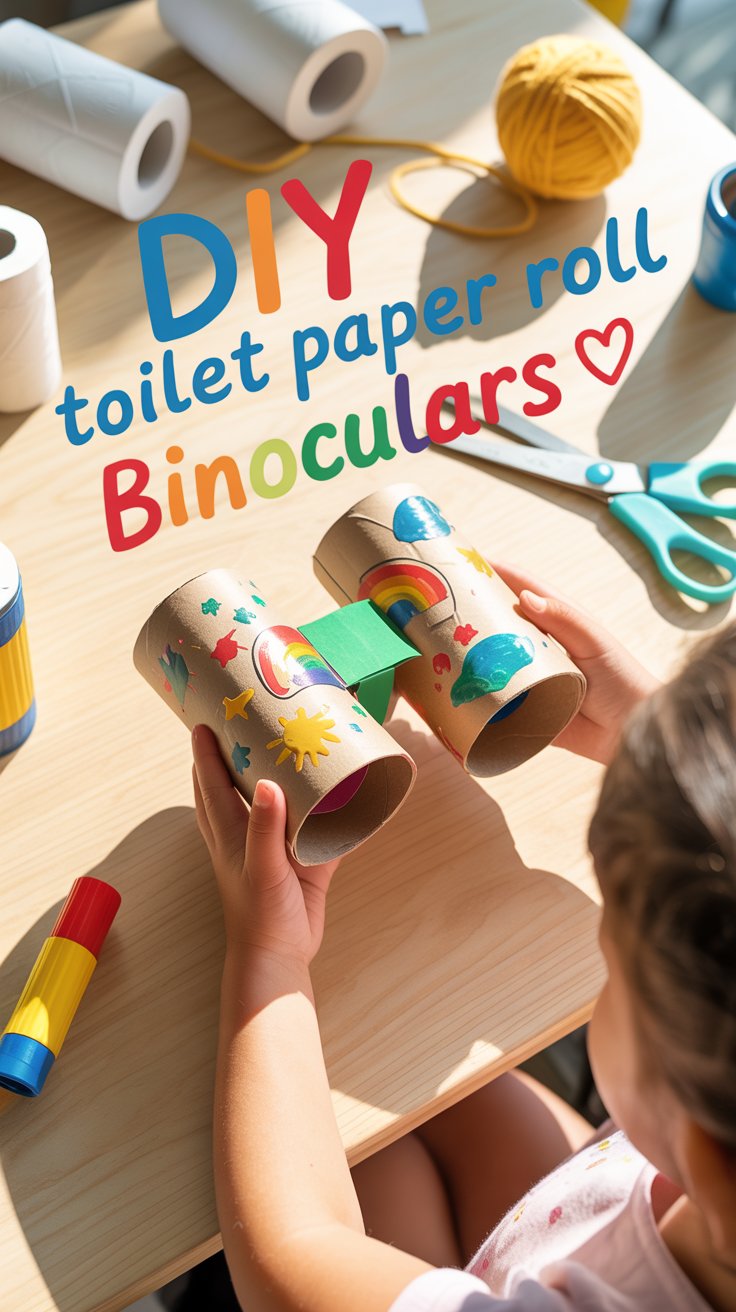
Transform two simple cardboard rolls into a world of imagination! These DIY binoculars are perfect for backyard explorers and little adventurers who love pretend play. Kids can decorate, personalize, and set off on their own safari — all with items you already have at home.
Materials Checklist:
-
Toilet Paper Rolls (craft tubes) — 2 per pair of binoculars
-
String or Yarn — for the neck strap
-
Tape or Glue — to hold the rolls together
-
Markers, Stickers, or Paint — for decorating and creative flair
How To:
-
Tape or glue two toilet paper rolls together side by side.
-
Use a hole punch to make small holes on the sides and thread yarn through for a strap.
-
Decorate with markers, stickers, or paint — let your creativity run wild!
-
Go on an indoor safari or backyard nature hunt!
Dos & Don’ts
Do let the glue fully dry before wearing.
Don’t use heavy string — yarn works best for comfort.
Do encourage kids to decorate with their favorite colors.
Don’t forget to write their name or initials on the side!
6. Salt Dough Ornaments
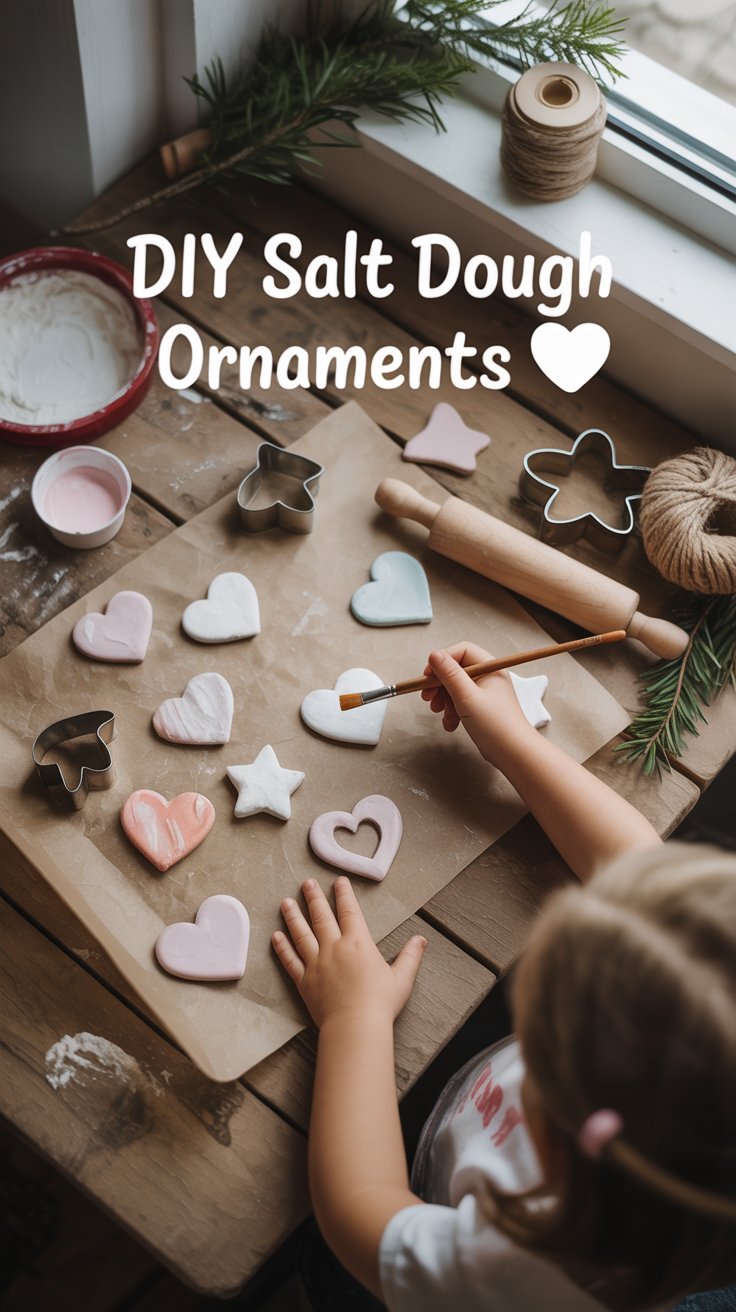
Turn a rainy afternoon into a creative masterpiece with easy homemade salt dough! Kids will love mixing, rolling, and shaping their own ornaments — and you’ll love how simple and inexpensive this timeless craft is. Once baked and cooled, they can paint and personalize each piece with glitter, stamps, or their initials for a keepsake that lasts for years.
How To:
-
Mix 2 cups flour, 1 cup salt, and 1 cup warm water into a dough.
-
Roll it out on parchment paper and use cookie cutters for fun shapes.
-
Poke a small hole for hanging and bake at 250°F (120°C) for 2–3 hours until hard.
-
Once cooled, paint and seal with clear varnish.
Shop the Look:
Dos & Don’ts
Do let the dough fully dry before painting.
Don’t roll it too thin or it may crack.
Do use parchment for easy cleaning
Don’t forget to write the year on each ornament!
7. Button Art Canvas 🌈
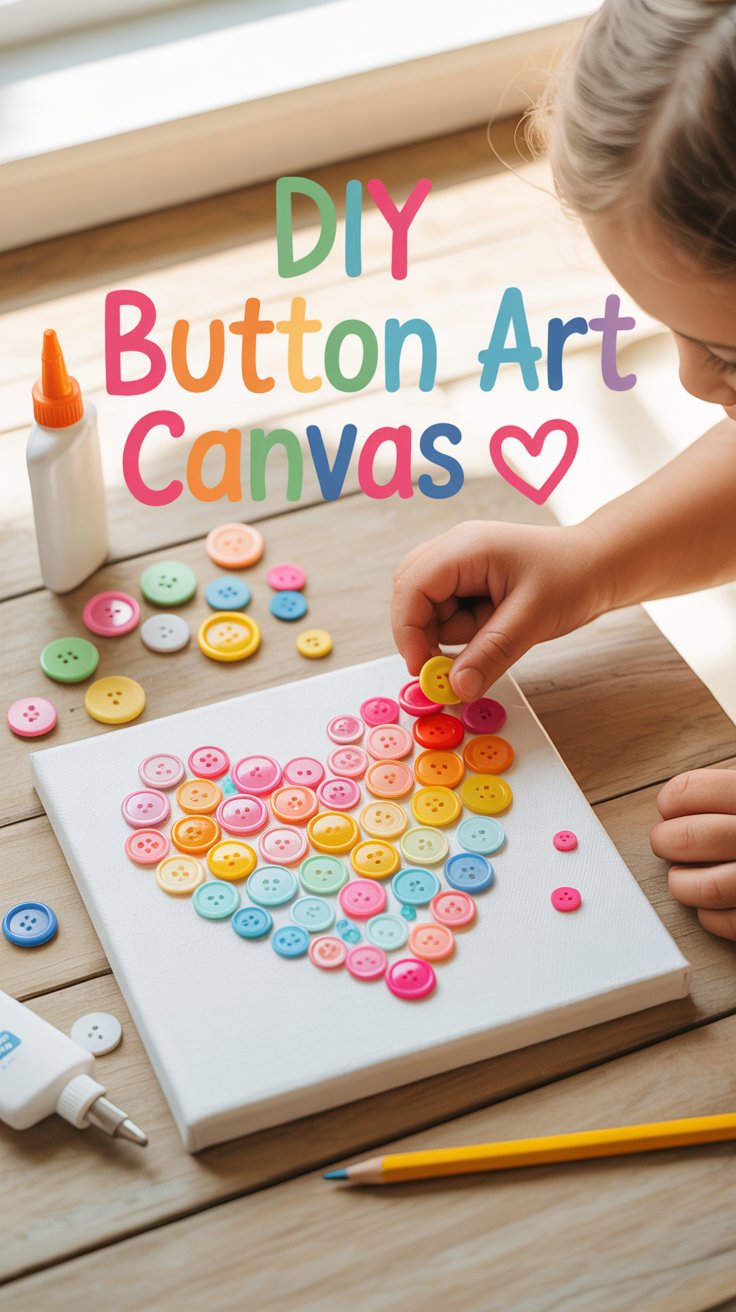
Turn that jar of spare buttons into something beautiful! This cheerful craft lets kids design colorful wall art by arranging buttons into shapes like hearts, rainbows, or cute animals. It’s a wonderful way to encourage creativity and fine motor skills — plus it adds a pop of handmade charm to any room.
Materials Checklist:
-
Assorted Buttons — mix bright and pastel colors for variety
-
Small Canvas or Sturdy Cardboard — your base for the design
-
Craft Glue — to hold buttons securely in place
-
Pencil — for sketching outlines before gluing
How To:
-
Lightly sketch your design on the canvas or cardboard.
-
Arrange buttons over the outline to plan your pattern.
-
Glue each button down, starting from the center outward.
-
Let dry completely, then display your new piece of button art!
Dos & Don’ts
Do mix sizes and colors for texture and depth.
Don’t use too much glue — a dab is plenty.
Do let kids create freely without worrying about “perfect.”
Don’t forget to sign and date their masterpiece!
8. Homemade Slime ✨
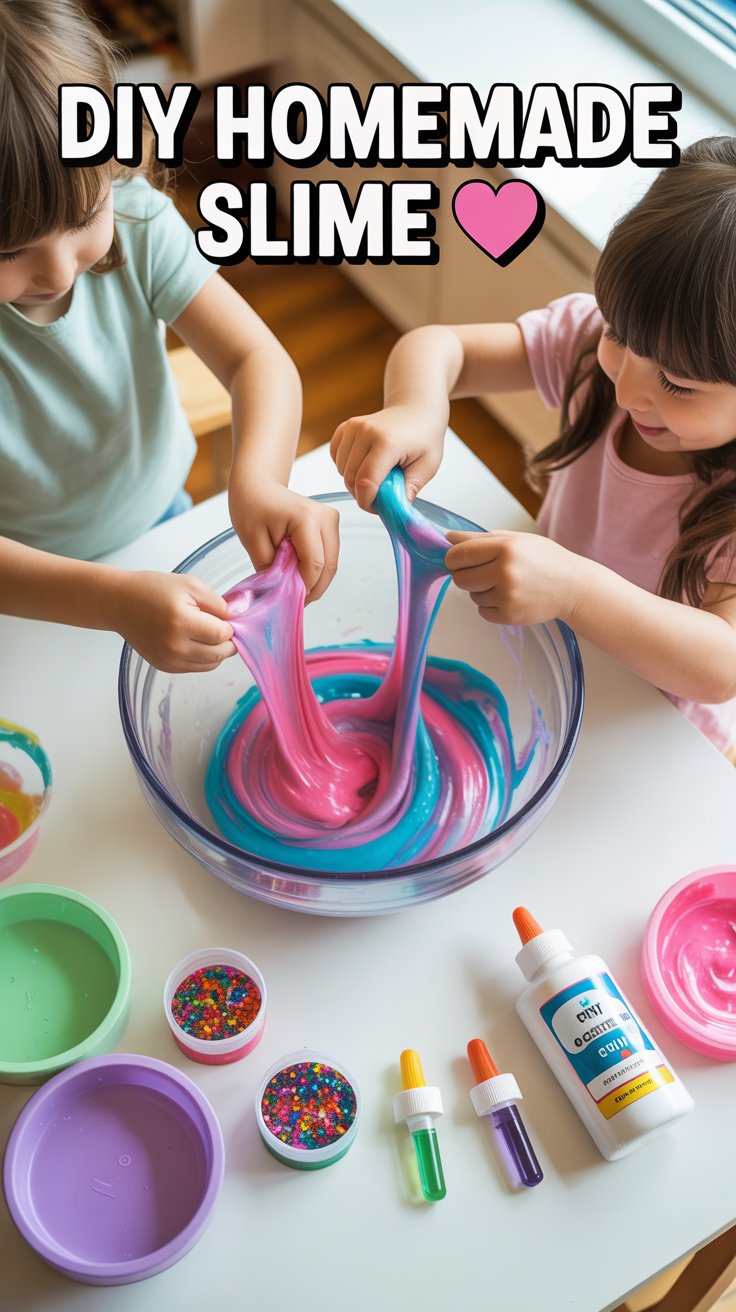
Every kid’s favorite gooey craft! Making your own slime is the perfect rainy-day activity that sparks creativity and sensory play. With just a few simple ingredients, kids can stretch, squish, and swirl their way to endless fun — and customize it with colors or glitter for a magical touch.
Materials Checklist:
-
White School Glue — the base that gives slime its stretch
-
Baking Soda — helps thicken the slime
-
Contact Lens Solution — the secret activator
-
Food Coloring or Glitter — for sparkle and color
How To:
-
In a bowl, mix ½ cup of glue with 1 tablespoon of baking soda.
-
Add a few drops of food coloring or glitter and stir.
-
Slowly add contact solution (1–2 tablespoons), stirring until the slime forms.
-
Knead until stretchy, then start playing!
Dos & Don’ts
Do store slime in an airtight container to keep it soft.
Don’t add too much contact solution — it can make it stiff.
Do let kids choose their favorite colors and glitters.
Don’t forget to wash hands before and after playtime!
9. Cupcake Critters 🧁
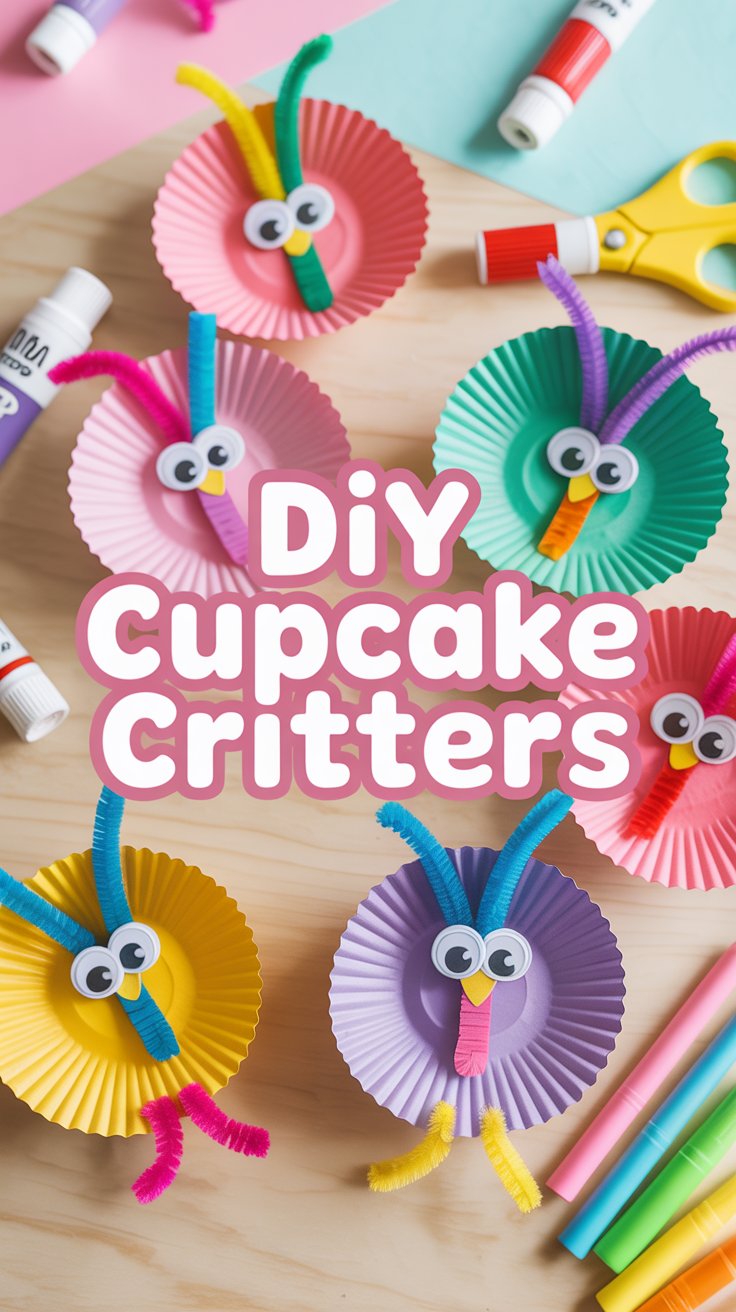
Turn simple cupcake liners into the cutest little critters! This craft is bursting with color, creativity, and imagination — perfect for rainy afternoons or classroom fun. Kids can mix and match liners, googly eyes, and pipe cleaners to make butterflies, owls, or even silly monsters.
Materials Checklist:
-
Cupcake Liners — choose bright patterns or pastel tones
-
Googly Eyes — for that adorable touch
-
Pipe Cleaners — great for wings, legs, or antennae
-
Glue Stick or Craft Glue — to hold everything in place
-
Markers or Paint Pens — for faces and details
How To:
-
Flatten cupcake liners and fold or layer them to make critter shapes.
-
Add googly eyes, pipe cleaner wings or legs, and draw on fun facial expressions.
-
Glue everything together and let dry completely.
-
Display on cardstock or hang with yarn for a cute wall gallery!
Dos & Don’ts
Do mix colors and liner sizes for unique creatures.
Don’t use too much glue — it can wrinkle the paper.
Do encourage kids to name their critters!
Don’t forget to snap a photo of their creations.
10.DIY Kaleidoscope
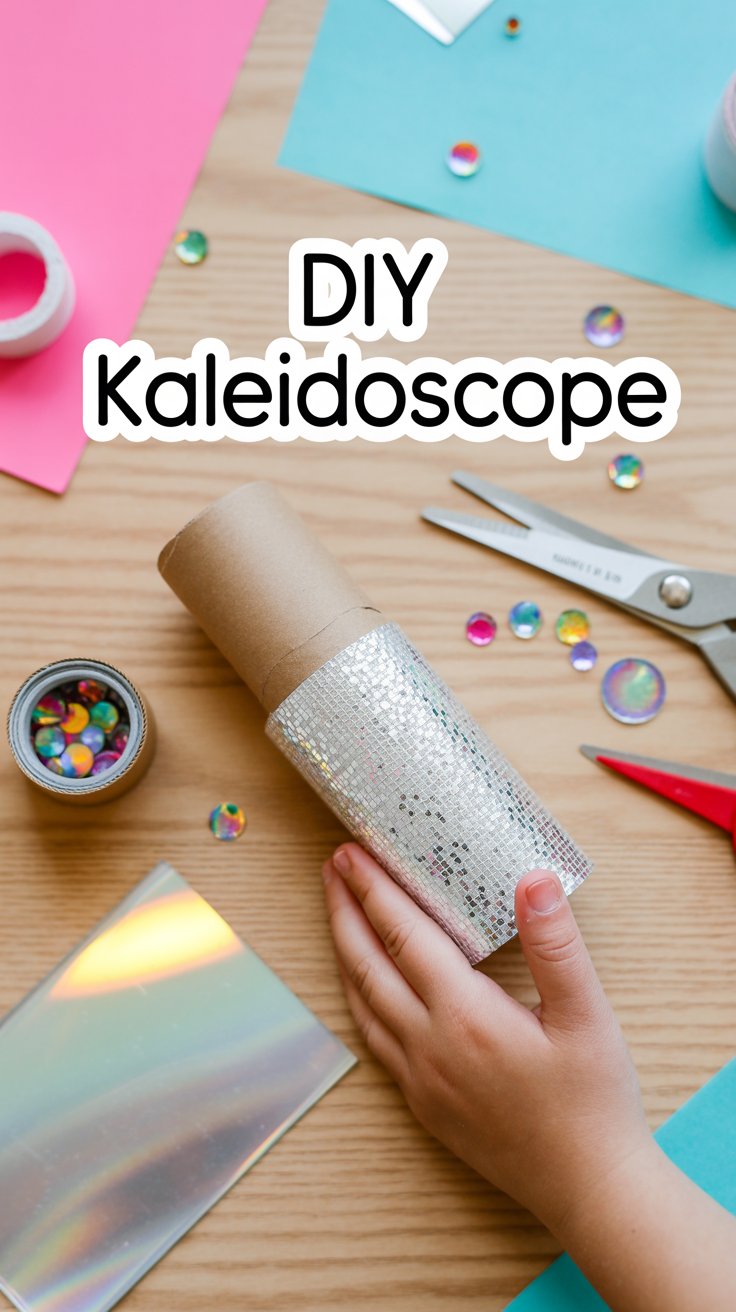
Bring a bit of science and sparkle into craft time with this magical DIY kaleidoscope! Kids will be fascinated by the colorful patterns they create with just a cardboard tube, foil, and a sprinkle of imagination. It’s an easy way to explore light and reflection while making something truly beautiful.
Materials Checklist:
-
Cardboard Tube — use one from wrapping paper or purchase craft tubes
-
Foil or Reflective Paper — creates the shiny inner surface
-
Transparent Plastic Sheet or Wax Paper — for sealing the end
-
Beads, Sequins, or Confetti — to fill with color and sparkle
-
Tape and Scissors — for assembly
How To:
-
Cut foil into three long strips and tape them together into a triangle shape to fit inside the tube.
-
Add beads or confetti to one end, then cover with the transparent sheet.
-
Tape securely so pieces can move but not fall out.
-
Look through the open end and twist to see dazzling patterns of light!
Dos & Don’ts
Do use bright beads for colorful reflections.
Don’t overfill — too many pieces block the light.
Do let kids personalize the tube with stickers or paint.
Conclusion
Crafting with kids doesn’t have to be complicated—or expensive. With a little imagination and a few supplies from around the house, you can create hours of fun, laughter, and beautiful keepsakes. Plus, these projects aren’t just about the finished product—they’re about the memories you make together along the way.
So grab those paper plates, rocks, and buttons, and let the creativity flow. And if you try any of these projects, I’d love to see the results—share your photos or stories in the comments below!
Happy crafting! ✂️🎨✨